
How to Clean Air Cooler Honeycomb Pads to Get Great Air Cooling Performance?
Hot days make air coolers a must. But when the honeycomb pads inside turn dirty, the cooling feels weak. Many people think the cooler is broken, but usually it’s not. The pads are just blocked with dust, minerals, or even algae. The good news is you don’t need to call a repair service. Washing them yourself is simple, and once you do it, the difference is clear. Stronger airflow, better cooling, fresher air. And you save money too.
Why Cleaning Honeycomb Pads Matters
Impact on Cooling Efficiency
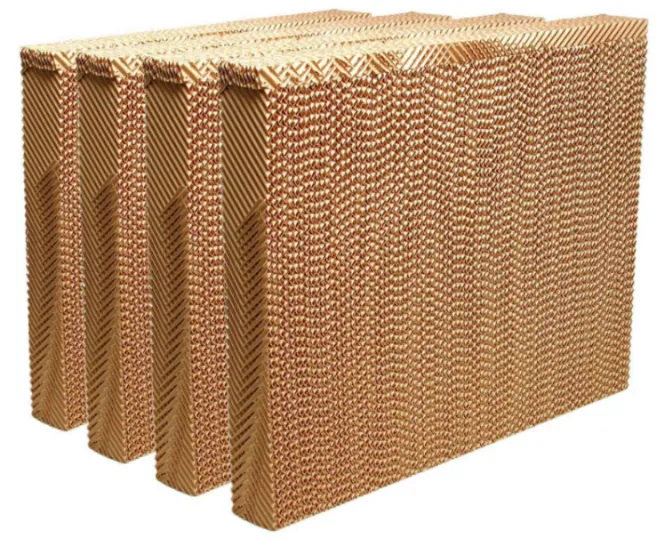
The honeycomb pad is like the lungs of an air cooler. If it’s clean, water spreads evenly and air flows freely. The passing air absorbs moisture, and the result is cool, comfortable wind. But once dirt builds up, the water does not spread the same way. The pad becomes patchy. Air cannot pick up enough moisture, so the cooling drops fast. What you get is warm air instead of relief.
By the way, many people replace the cooler too early because they don’t realize this simple point. A quick wash often brings performance back, almost like new.
Longer Pad Lifespan and Cost Savings
Pads are not cheap if you need to buy them often. They are made of cellulose material, designed to hold water for hours of use. But dust, sand, and hard water minerals slowly break them down. When that happens, airflow suffers, and cooling stops.
The trick is easy: keep them clean. A 15–20 minute wash every few weeks can extend pad life by one or even two years. That means less waste and more savings. It’s one of those small tasks that pay off big later.
Preventing Mold, Odor, and Bacteria Growth
Another reason cleaning matters is health. Dirty pads hold extra water. That damp surface is the perfect home for mold, bacteria, and sometimes green algae. Once they start to grow, the smell becomes obvious. A musty, unpleasant odor fills the room, and you breathe it in every time the cooler runs.
Clean pads stop that problem. Fresh pads = fresh air. It’s that simple.
Signs Your Honeycomb Pads Need Cleaning
Reduced Airflow and Cooling Output
If the cooler feels weak, don’t panic about the motor. Most of the time, airflow drops because pads are clogged. Dust and minerals block the tiny air passages.
Tip: Put your hand near the airflow. If it feels weaker than last week, it’s probably time to clean.
Strange Odors or Musty Smell
Smell is a strong sign. When bacteria grow inside pads, the odor spreads through the entire space. And here’s the thing, once you smell it, the bacteria are already well developed. Don’t ignore it.
Visible Dirt, Dust, or Algae Buildup
Sometimes it’s not subtle. You can see the problem right away. Black dust, yellow stains, or green algae spots. If you can see it, it means the cooling has already dropped. Waiting longer will only make the work harder later.
Tools and Materials You’ll Need
Soft Brush or Vacuum Cleaner
Start simple. A soft brush is enough for loose dust. If you have a small handheld vacuum, use it gently. Don’t use a rough brush. Pads are delicate, and a hard brush will tear fibers.
Mild Detergent or Vinegar Solution
You don’t need fancy cleaners. Mild soap in water works well. Vinegar mixed with water is also very good for white spots from hard water. Strong chemicals like bleach sound powerful, but they actually damage pads quickly.
Bucket, Gloves, and Clean Water
A bucket with warm water, protective gloves, and clean water for rinsing. Nothing complicated. Gloves protect your hands from dirt and vinegar, and clean water makes sure no soap stays inside the pads.
Step by Step Guide to Cleaning Honeycomb Pads
Turn Off and Unplug the Air Cooler
This one is basic but very important. Always unplug before cleaning. Even if the cooler looks harmless, water and electricity don’t mix.
Remove Honeycomb Pads Carefully
Open the panel, slide pads out slowly. Don’t bend or squeeze too hard. Pads are sturdy but not unbreakable.
Dry Cleaning with a Soft Brush or Vacuum
First step: remove loose dirt. A brush or vacuum does it fast. Be gentle. By the way, cleaning dust first makes the deep wash easier.
Deep Cleaning with Soap or Vinegar Solution
Fill the bucket with warm water. Add a little soap or a cup of vinegar. Soak pads for 20–30 minutes. Let water do the work. Dirt loosens, mineral stains fade. You don’t need to scrub hard.
Rinse Thoroughly and Let Pads Dry Completely
Take the pads out. Rinse under clean running water until no dirt or bubbles show. Then, and this part matters, let them dry. Leave them outside in sunlight if possible. Putting wet pads back only brings mold.
Reinstall Pads and Test Cooling Performance
Once dry, slide pads back in. Plug in the cooler and test. Air should feel stronger and cooler. Honestly, you’ll notice the difference in a minute.
Maintenance Tips for Long Lasting Honeycomb Pads
Regular Cleaning Schedule
Clean every 2–4 weeks if you use the cooler often. If you live in a dusty area, maybe more. The more often you clean, the less dirt builds up.
Use Clean Water in the Cooler Tank
Water quality matters. Hard water leaves white stains on pads. If you can, use filtered water. At least avoid very hard water.
Store Air Cooler Properly During Off Season
Before storing, clean the pads, empty the tank, and cover the cooler. By the way, this is one step people skip all the time, and then complain next summer when mold shows up.
When to Replace Old Pads
Pads last about 6–7 years with care. If cooling feels weak even after a wash, it’s time to replace. Pads are not magic. They wear out.
Common Mistakes to Avoid
Using Harsh Chemicals That Damage Pads
Bleach or strong cleaner sounds like a quick fix, but pads don’t like it. The material becomes weak. Always stick to mild options.
Skipping Drying Process Before Reinstallation
It’s tempting to rush. Don’t. Wet pads encourage mold. Always dry fully before putting them back.
Ignoring Manufacturer’s Instructions
Each cooler has its own design. The manual has good advice. Reading it once saves you a lot of trouble.
Final Thoughts
Cleaning honeycomb pads is not fancy work. It’s quick, easy, and gives back strong cooling. It saves money and improves comfort.
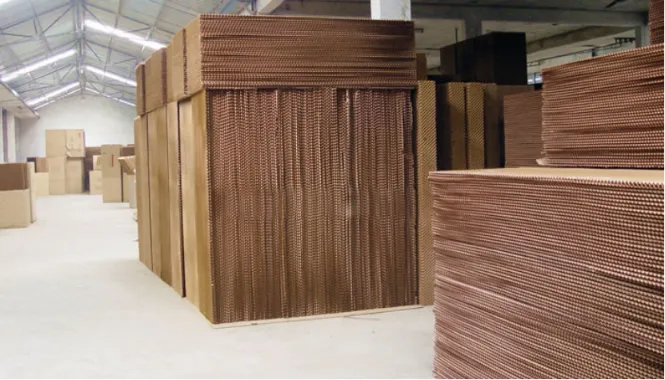
And if you look at larger projects, like poultry farms, industrial workshops, or even greenhouses, equipment quality matters even more. Foshan Daiho Equipment Co., Ltd. provides cooling systems trusted worldwide. Their products include exhaust fans, circulation fans, air coolers, cooling pads, dehumidifiers, and heaters. With ISO9001 and CE approved systems, Daiho supports industries, agriculture, and civil buildings with reliable solutions.
FAQ on Honeycomb Pad Cleaning
Q1: How often should I clean air cooler honeycomb pads?
A1: If you use the cooler daily, every 2–4 weeks is smart. At least once before storage.
Q2: Can I use bleach or strong chemicals to clean the pads?
A2: No. Harsh chemicals shorten pad life. Stick with soap or vinegar.
Q3: How long do honeycomb pads last with proper care?
A3: Around 6–7 years. Longer if you clean often and use good water.
Q4: What’s the difference between honeycomb pads and aspen pads?
A4: Honeycomb pads cool better, last longer, and cost more. Aspen pads are cheaper but need replacement more often.
Q5: Does cleaning honeycomb pads improve energy efficiency?
A5: Yes. Clean pads let air flow easily, so the motor works less. Lower power bills are the bonus.